
The Easiest Apple Crisp
Hey there, friends! I’ve gotta share something sweet with you today: The Easiest Apple Crisp I’ve ever whipped up in my kitchen.
I discovered this gem of a recipe a few autumns ago when my family begged for a cozy dessert after a chilly day of apple picking, and honestly, I haven’t looked back since. The Easiest Apple Crisp is my go-to when I want something comforting without spending hours slaving over a hot stove.
You see, I’m not a fancy chef—just a home cook who loves a good shortcut. That day, with a bushel of apples staring me down, I threw together The Easiest Apple Crisp with what I had on hand, and my kids practically inhaled it. It’s become a fall tradition ever since, and I’m thrilled to pass it along to you!
I know life gets busy, so trust me when I say The Easiest Apple Crisp is as simple as it gets. Let’s dive into why this dessert will steal your heart (and maybe your family’s too).
Why You’ll Love This Recipe
I’ve found that The Easiest Apple Crisp just hits all the right notes. It’s got that perfect balance of sweet, tart apples and a buttery, crunchy topping that makes you wanna sneak a second helping. In my kitchen, it’s a crowd-pleaser every single time, whether I’m serving it to picky eaters or dessert snobs.
And can we talk about the smell? When The Easiest Apple Crisp is baking, my whole house smells like a fall dream—cinnamon, sugar, and apples all mingling together. Plus, it’s so forgiving; even if you mess up a bit, it still tastes like a million bucks. You’ll love how low-stress this one is!
Ingredients List
Alright, let’s get down to business with what you’ll need for The Easiest Apple Crisp. I’m all about keeping things simple, so I stick to basics you probably already have in your pantry. Here’s my rundown, with a few personal notes on what I prefer to use for the best flavor.
I usually buy apples from a local orchard if I can, but any grocery store haul works too. For the topping, I’m picky about using real butter—trust me, it makes a difference in The Easiest Apple Crisp. Let’s break this into two parts for clarity.
For the Apple Filling
- 6 medium apples (about 2.5 lbs or 1.1 kg), peeled, cored, and sliced thin—I like a mix of Granny Smith and Honeycrisp for sweet-tart vibes
- 1/2 cup (100g) granulated sugar, for sweetness with a touch of caramelization
- 1 tablespoon (8g) all-purpose flour, to thicken the juices
- 1 teaspoon (2g) ground cinnamon, for that warm, cozy kick
- 1 tablespoon (15ml) lemon juice, to brighten up the flavors
For the Crisp Topping
- 1 cup (125g) all-purpose flour, the base for that crumbly goodness
- 3/4 cup (150g) brown sugar, packed—I prefer light brown for a softer molasses note
- 3/4 cup (70g) old-fashioned rolled oats, for texture (don’t use instant oats!)
- 1/2 cup (115g) unsalted butter, cold and cut into cubes—cold is key for a flaky top
- 1/2 teaspoon (1g) ground cinnamon, to tie it all together
These ingredients make The Easiest Apple Crisp a breeze to throw together. I’ve tweaked this list over time to get it just right, so stick with me here!
Variations
One of the reasons I adore The Easiest Apple Crisp is how easy it is to switch things up based on what I’m craving or who’s eating it. I’ve played around with this recipe more times than I can count, and I’m sharing some of my favorite twists below. Whether you’re a nut lover or looking to sneak in extra fruit, there’s a version of The Easiest Apple Crisp for everyone.
These variations keep things fresh, especially if you’re making The Easiest Apple Crisp as often as I do in the fall. My family has their favorites, and I bet you’ll find one that speaks to you too. Here are some ideas I’ve tried and loved (or at least learned from!).
- Nutty Crunch: Toss in 1/2 cup of chopped pecans or walnuts to the topping for an earthy, rich bite. I tried this once for a holiday party, and it was a hit!
- Berry Blast: Mix 1 cup of fresh or frozen blueberries with the apples for a pop of color and tartness. My kids always ask for this one.
- Spiced Up: Add 1/4 teaspoon of nutmeg or allspice to the filling for a deeper, warmer flavor profile. It’s my secret for extra coziness.
- Caramel Drizzle: Drizzle 1/4 cup of store-bought caramel sauce over the top after baking. I did this on a whim, and oh boy, pure decadence!
- Gluten-Free Swap: Use gluten-free flour and certified GF oats in the topping. I’ve made this for a friend with dietary needs, and it still tasted amazing.
- Mixed Fruit Medley: Swap half the apples for pears or peaches for a different spin. I think this keeps The Easiest Apple Crisp exciting.
- Coconut Twist: Sprinkle 1/3 cup of shredded coconut into the topping for a tropical flair. It’s a bit unconventional, but I’m hooked.
- Boozy Kick: Stir 2 tablespoons of bourbon or rum into the apple mix before baking. I’ve done this for adult-only gatherings, and it’s a game-changer.
Servings and Timing
Let’s talk logistics for The Easiest Apple Crisp because I know you’re probably juggling a million things (I sure am most days!). In my experience, this recipe comes together pretty quickly, even if you’re peeling apples with a toddler tugging at your apron. Here’s the breakdown for planning your baking sesh with The Easiest Apple Crisp.
- Prep Time: 20 minutes
- Cook Time: 45 minutes
- Total Time: 1 hour 5 minutes
- Servings: 6-8 portions
It usually takes me the full 20 minutes to prep since I’m a bit slow with the peeler, but hey, you might be faster! Either way, it’s doable even on a hectic weeknight.
Step-by-Step Instructions
I’m gonna walk you through making The Easiest Apple Crisp like I’m right there in your kitchen. I’ve made this so many times I could probably do it blindfolded (okay, maybe not, but you get the idea). Follow along with my little tips, and you’ll have a bubbling, golden dessert in no time.

Step 1: Preheat and Prep
First things first, crank your oven to 350°F (175°C). Grease an 8×8-inch baking dish with a smidge of butter or cooking spray—I’ve learned the hard way that skipping this means a sticky mess. While you’re at it, peel, core, and slice those apples into thin wedges. I usually sip some coffee during this part to keep my patience in check!
Step 2: Mix the Apple Filling
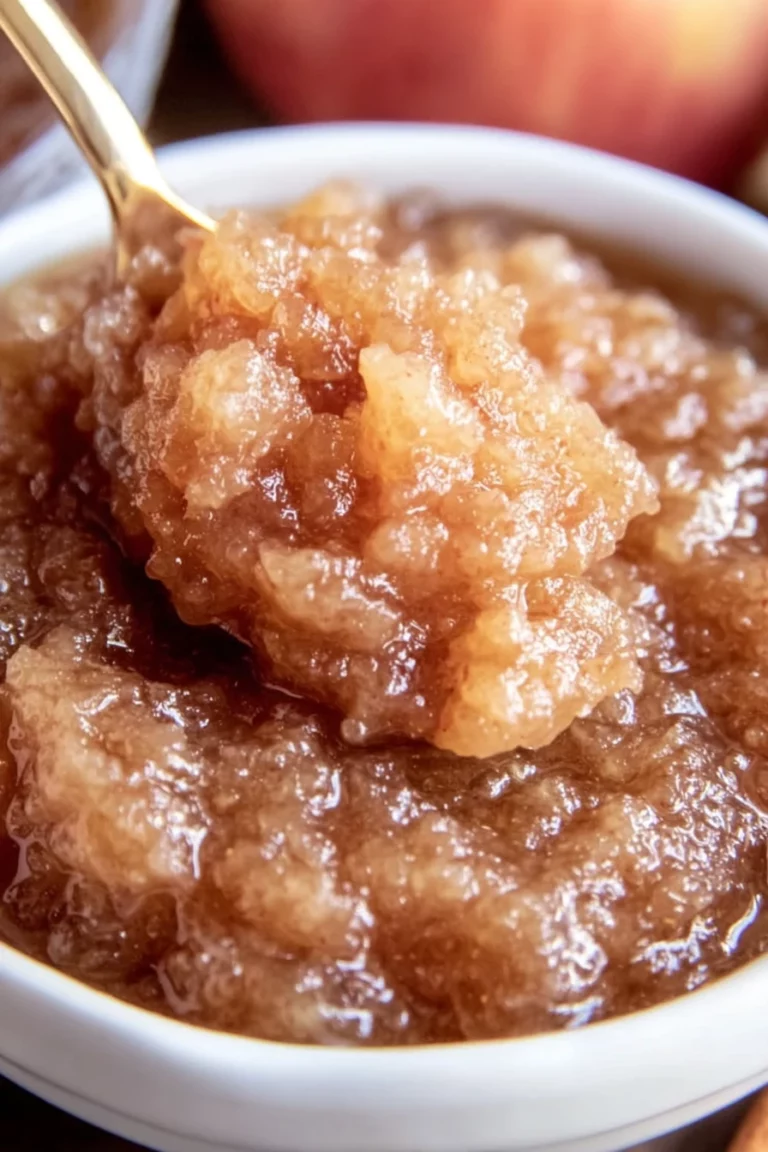
Toss your apple slices in a big bowl with the sugar, flour, cinnamon, and lemon juice for The Easiest Apple Crisp. Stir until they’re nicely coated—don’t be shy, get your hands in there if you gotta. Spread this mix evenly into your greased dish. I love how the lemon juice keeps the apples from browning too fast.
Step 3: Make the Crisp Topping
Now for the fun part of The Easiest Apple Crisp: that crumbly topping! In another bowl, combine the flour, brown sugar, oats, and cinnamon. Cut in the cold butter with a pastry cutter or your fingers until it looks like coarse crumbs. I always use my hands—feels like I’m channeling my inner grandma—and it works like a charm.
Step 4: Assemble and Bake
Sprinkle that topping over the apples, making sure it’s even. Pop The Easiest Apple Crisp into the oven for 45 minutes or until the top is golden and the apples are bubbling. My house smells like a fall festival at this point, and I can barely wait to dig in.
Step 5: Cool and Enjoy
Let The Easiest Apple Crisp cool for about 10 minutes before serving—trust me, burning your tongue isn’t worth the rush. I usually sneak a tiny bite while it’s still warm because I’m impatient like that. Scoop it out, and you’re golden!
Nutritional Information
I’m no dietitian, but I like to keep an eye on what I’m serving my family with The Easiest Apple Crisp. Here’s the rough nutritional breakdown per serving, based on 8 portions. Keep in mind, this isn’t a “health food,” but it’s a treat worth every bite for The Easiest Apple Crisp fans like me.
- Calories: 320 per serving
- Fat: 12g
- Protein: 3g
- Carbohydrates: 52g
- Sodium: 90mg
Healthier Alternatives
If you’re looking to lighten up The Easiest Apple Crisp, I’ve got some swaps that I’ve tried and actually liked. I’m not always in the mood for full-on indulgence, so these tweaks help me feel a bit better about seconds (or thirds). Here are my go-to healthier options for The Easiest Apple Crisp without losing that cozy vibe.
- Less Sugar: Cut the granulated sugar in the filling to 1/3 cup and use a touch of honey instead. I’ve done this when watching my sweet tooth.
- Butter Swap: Replace half the butter with unsweetened applesauce in the topping. It’s still yummy, just a tad less rich for The Easiest Apple Crisp.
- Whole Grain Boost: Use whole wheat flour instead of all-purpose for a fiber kick. I think it adds a nutty depth.
- Lower Cal Topping: Skip some oats and add crushed bran cereal for crunch with fewer calories. I’ve swapped this for The Easiest Apple Crisp on lighter days.
Serving Suggestions
I love getting creative with how I dish out The Easiest Apple Crisp because it’s so versatile. Whether it’s a casual weeknight or a big family gathering, here are some ways I’ve served it that always get rave reviews. Make The Easiest Apple Crisp your own with these ideas!
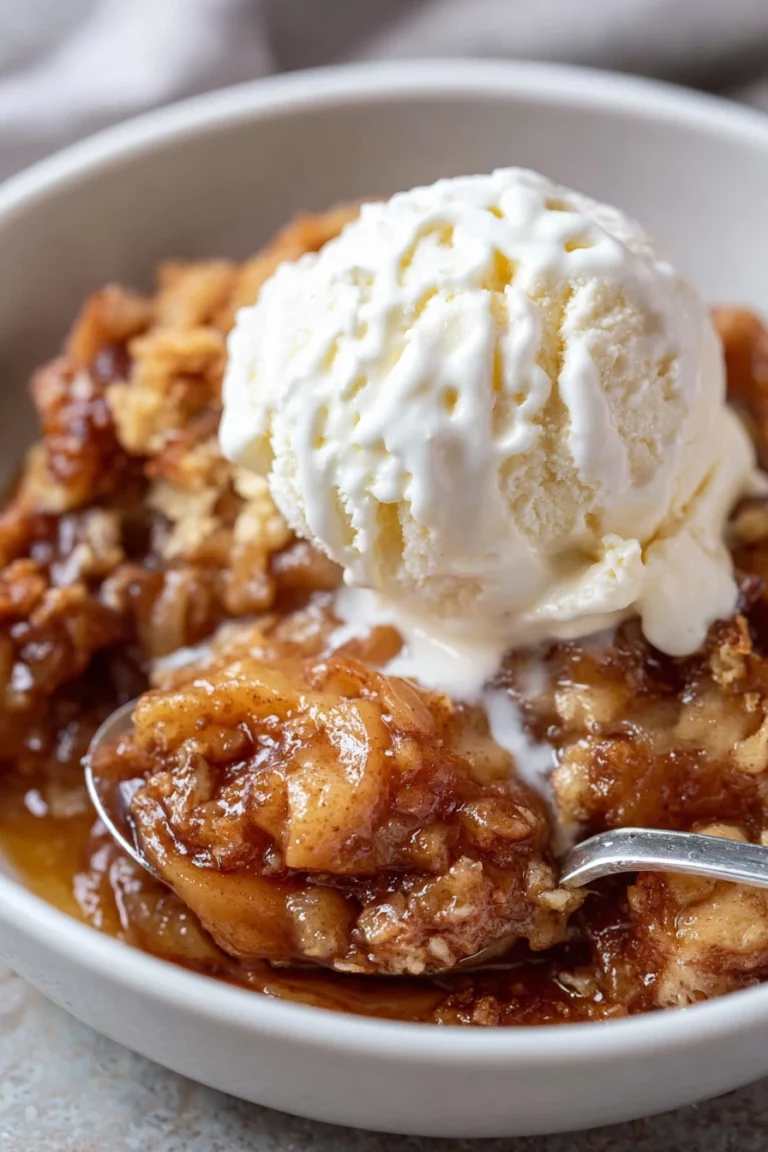
- Classic Comfort: Top with a scoop of vanilla ice cream while it’s still warm. I’m obsessed with that melty contrast.
- Breakfast Treat: Pair a small serving with plain Greek yogurt for a sneaky morning dessert. I’ve done this more than I care to admit!
- Party Style: Serve in small ramekins for individual portions at get-togethers. At my last dinner party, this was a total hit with The Easiest Apple Crisp.
- Whipped Wonder: Add a dollop of freshly whipped cream with a sprinkle of cinnamon. It’s my fancy touch for guests.
Common Mistakes to Avoid
I’ve botched The Easiest Apple Crisp a few times in my early attempts, so let me save you the headache with some pitfalls I’ve stumbled into. Trust me on this one, these little missteps can turn your dessert from “wow” to “woe.” Here’s what to watch out for when making The Easiest Apple Crisp.
- Overcooking Apples: Don’t bake too long, or you’ll get mush instead of tender bites. I learned the hard way with a sad, soggy mess.
- Skimping on Butter: Cutting back too much on butter makes the topping dry. I tried it once for “health,” and it just wasn’t The Easiest Apple Crisp.
- Uneven Topping: Spread that crumble evenly, or you’ll have bald spots with no crunch. Guilty as charged on my first go!
- Wrong Apple Choice: Avoid super soft apples like Red Delicious—they turn to applesauce. I’ve made this mistake with The Easiest Apple Crisp, ugh.
Storing Tips
I’ve found that The Easiest Apple Crisp keeps pretty well if you store it right, which is great since I usually make a big batch. In my experience, leftovers (if there are any!) taste just as good the next day. Here’s how I keep The Easiest Apple Crisp fresh.
- Refrigerator: Store in an airtight container for up to 4 days. I reheat in the microwave for a quick fix.
- Freezer: Freeze unbaked crisp in a foil pan for up to 2 months. Thaw overnight before baking.
- Room Temp: Okay for a day if covered, but I don’t risk it longer.

Frequently Asked Questions
I get a bunch of questions about The Easiest Apple Crisp, so I’ve rounded up the most common ones I hear from friends and readers. Let’s tackle these head-on so you can bake with confidence. Here’s the scoop on The Easiest Apple Crisp queries!
Can I make The Easiest Apple Crisp ahead of time?
Totally! I often prep the filling and topping separately a day ahead, store ‘em in the fridge, then assemble and bake when ready. It saves so much time for busy days.
What apples are best for this recipe?
I swear by a mix of Granny Smith for tartness and Honeycrisp for sweetness. They hold up well without getting too mushy in the oven.
Can I use quick oats instead of rolled oats?
Eh, I wouldn’t. Quick oats get too soft and lose that hearty crunch I love in The Easiest Apple Crisp. Stick with old-fashioned if you can.
Is this recipe gluten-free?
Not as written, but swap in gluten-free flour and certified GF oats, and you’re golden. I’ve done it for a friend, and it still rocks.
How do I reheat leftovers?
Pop a serving in the microwave for 30-45 seconds, or reheat the whole dish in a 300°F oven for 10 minutes. I prefer the oven for that fresh-baked feel.
Can I double the recipe?
Yup, I’ve doubled it for potlucks using a 9×13 dish. Just add 10-15 minutes to the baking time, and check for golden topping.
Do I have to peel the apples?
Nah, you don’t have to, but I do ‘cause the skins can get tough after baking. It’s a texture thing for me, but do what you like!
Can I add other fruits?
For sure! I’ve tossed in berries or pears with great results for The Easiest Apple Crisp. Just keep the total fruit amount about the same.
Conclusion
Well, there you have it, folks—my take on The Easiest Apple Crisp that’s been a lifesaver in my kitchen for years. I hope you’ll give it a whirl and make some sweet memories with your crew, just like I have. If you’ve got stories or tweaks on The Easiest Apple Crisp, drop ‘em below—I’d love to hear! Happy baking, y’all!
Conclusion
I hope you enjoyed this recipe for The Easiest Apple Crisp! It’s truly one of my favorites, and I’m confident you’ll love it too.
Remember to follow the steps carefully for the best results. Don’t hesitate to experiment with your own variations and make this recipe your own. Happy cooking!