Pumpkin Brownies
Fall is my absolute favorite season, and nothing screams autumn like the warm, cozy flavors of pumpkin. I stumbled upon the magic of Pumpkin Brownies a few years back when I was desperate to use up some leftover canned pumpkin after a pie-making spree. Let me tell you, these Pumpkin Brownies were a game-changer in my kitchen—my family went nuts for them! They’ve become a staple every October, and I’m thrilled to share this recipe with you.
I mean, who doesn’t love a dessert that combines the fudgy goodness of brownies with the spiced, earthy vibe of pumpkin? It’s like a hug in dessert form. I’ve tweaked this Pumpkin Brownies recipe over the years to get that perfect balance of moistness and flavor, and I can’t wait for you to try it.
Why You’ll Love This Recipe
I’ve found that Pumpkin Brownies are one of those rare treats that please just about everyone, from picky eaters to dessert snobs. In my kitchen, they disappear faster than I can say “second helping,” and I bet they’ll do the same in yours. It’s the swirl of pumpkin spice with rich chocolate that makes every bite feel like a celebration of fall.
Plus, these Pumpkin Brownies aren’t just tasty—they’re super easy to whip up, even if you’re not a baking pro. I’m talking minimal mess and maximum flavor. Whether you’re baking for a cozy night in or a holiday potluck, this recipe’s got your back.
Ingredients List
I’m a bit of a stickler when it comes to ingredients for Pumpkin Brownies because quality really makes a difference here. I usually buy pure canned pumpkin (not pie filling!) from my local grocery store to save time, though I’ve roasted my own pumpkin before for an extra depth of flavor. Let’s break down what you’ll need to make these fudgy, fall-inspired treats.
For the Brownie Layer
- 1/2 cup (115g) unsalted butter, melted for that rich texture
- 1 cup (200g) granulated sugar, to sweeten things up
- 2 large eggs, at room temperature for better mixing
- 1 teaspoon vanilla extract, for a hint of warmth
- 3/4 cup (95g) all-purpose flour, sifted if you’re feeling fancy
- 1/2 cup (45g) unsweetened cocoa powder, I prefer Dutch-processed for depth
- 1/4 teaspoon salt, to balance the sweetness
For the Pumpkin Layer
- 3/4 cup (180g) canned pumpkin puree, make sure it’s pure pumpkin
- 1/4 cup (50g) granulated sugar, just enough sweetness
- 1 large egg, for structure
- 1/2 teaspoon ground cinnamon, for that classic fall kick
- 1/4 teaspoon ground nutmeg, don’t skip this—it’s amazing
- 1/4 teaspoon ground ginger, for a little zing
- 2 tablespoons (15g) all-purpose flour, to thicken it up
These ingredients for Pumpkin Brownies are pretty straightforward, and I bet you’ve got most of them in your pantry already. I like keeping things simple, so I don’t go overboard with extras, though we’ll talk variations next!
Variations
One thing I adore about Pumpkin Brownies is how versatile they are. Over the years, I’ve played around with this recipe to suit different moods (and cravings), and my family always has opinions on their favorite twists. Here are some variations for Pumpkin Brownies that I’ve tried and loved, so you can mix things up too.
- Nutty Crunch: Toss in 1/2 cup of chopped walnuts or pecans to the brownie batter for a satisfying bite. I tried this once for a Thanksgiving dessert, and my uncle wouldn’t stop raving about it.
- Chocolate Chip Overload: Mix 1/3 cup of semi-sweet chocolate chips into the pumpkin layer for extra gooeyness. My kids always beg for this version!
- Spiced Up: Add an extra 1/4 teaspoon of cloves to the pumpkin mix for a deeper, spicier flavor. It’s a little bold, but I’m obsessed with it.
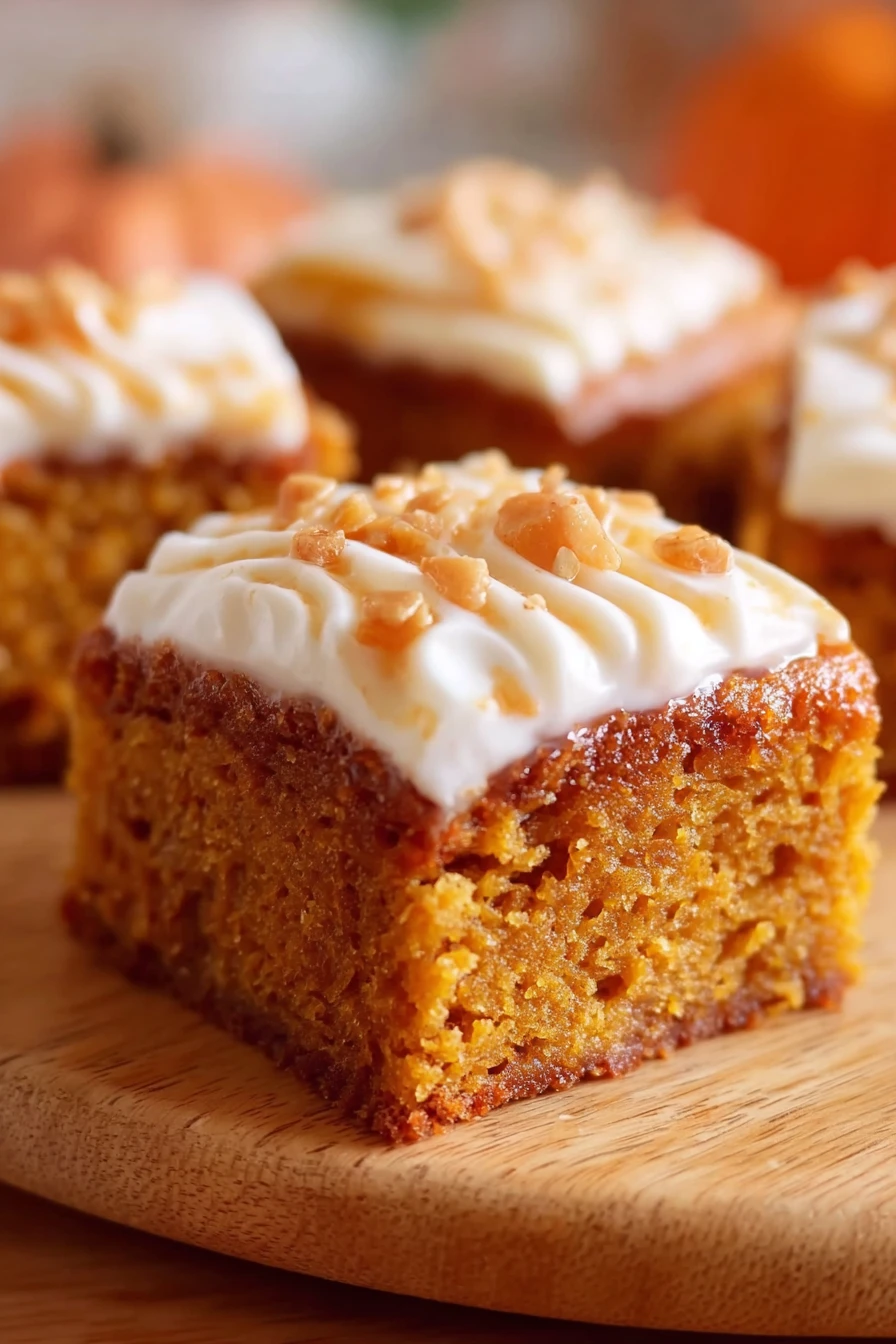
- Cream Cheese Swirl: Blend 4 ounces of softened cream cheese with 2 tablespoons sugar and swirl it into the top layer. I did this for a party, and it was a total showstopper.
- White Chocolate Drizzle: Melt 1/4 cup white chocolate and drizzle over the cooled Pumpkin Brownies for a sweet contrast. It looks so pretty, I almost didn’t want to eat it (almost).
- Gluten-Free Swap: Use a 1:1 gluten-free flour blend instead of all-purpose flour. I’ve made this for a friend with dietary needs, and it worked like a charm.
- Espresso Kick: Stir 1 teaspoon of instant espresso powder into the brownie batter for a mocha vibe. Trust me, it’s a grown-up twist that’s to die for.
I love experimenting with Pumpkin Brownies because there’s no wrong way to make them your own. What’s your go-to flavor combo? Let me know if you try any of these!
Servings and Timing
In my experience, timing is everything when it comes to baking something as delightful as Pumpkin Brownies. I’ve got this recipe down to a science, so you can plan accordingly, whether you’re baking for a crowd or just a quiet night in. Here’s the breakdown for making these Pumpkin Brownies without stress.
- Prep Time: 15 minutes
- Cook Time: 35 minutes
- Total Time: 50 minutes
- Servings: 9-12 squares, depending on how generous you’re feeling
Step-by-Step Instructions
I’m gonna walk you through making Pumpkin Brownies like I’m right there in the kitchen with you. I’ve made these dozens of times, so I’ve got a few tricks up my sleeve to ensure they come out perfect every time. Let’s dive in!

Step 1: Preheat and Prep
Start by preheating your oven to 350°F (175°C). Grease an 8×8-inch baking pan or line it with parchment paper—I’m a parchment fan because it makes cleanup a breeze. Getting this step right sets the tone for perfect Pumpkin Brownies.
Step 2: Make the Brownie Batter
In a big bowl, whisk together the melted butter and 1 cup of sugar until it’s smooth. Add in the 2 eggs and vanilla extract, mixing until it’s all cozy and combined. Sift in the flour, cocoa powder, and salt, and stir just until you don’t see any dry streaks—don’t overmix, or your Pumpkin Brownies will get tough!
Step 3: Whip Up the Pumpkin Layer
Grab another bowl and mix the pumpkin puree, 1/4 cup sugar, 1 egg, cinnamon, nutmeg, ginger, and 2 tablespoons of flour. Stir until it’s silky smooth. I love this part because the smell of those spices just screams fall, and it’s the heart of these Pumpkin Brownies.
Step 4: Layer It Up
Spread about two-thirds of the brownie batter into your prepared pan. Then, dollop the pumpkin mixture on top and spread it out evenly. Drop spoonfuls of the remaining brownie batter over the pumpkin layer and swirl it gently with a knife for that gorgeous marbled look in your Pumpkin Brownies.
Step 5: Bake to Perfection
Pop the pan into the oven and bake for 30-35 minutes, or until a toothpick inserted in the center comes out with a few moist crumbs. I’ve learned not to overbake these Pumpkin Brownies—err on the side of underdone for that fudgy texture. Let them cool for at least 20 minutes before cutting, if you can resist!
Nutritional Information
I’m not gonna lie—I don’t always think about calories when I’m indulging in Pumpkin Brownies, but I know some of you like to keep track. Here’s the nutritional breakdown per square, based on cutting the batch into 9 pieces. It’s a treat, sure, but it’s nice to know what you’re working with for these Pumpkin Brownies.
- Calories: 260 per serving
- Fat: 12g
- Protein: 4g
- Carbohydrates: 35g
- Sodium: 90mg
Healthier Alternatives
If you’re looking to lighten up Pumpkin Brownies, I’ve got some swaps that I’ve tried over the years. I’m not always in the mood for healthier baking, but when I’m watching my intake, these work surprisingly well. Here are a few ways to make Pumpkin Brownies a bit guilt-free without sacrificing flavor.
- Less Sugar: Cut the sugar in the brownie layer to 3/4 cup and use a natural sweetener like maple syrup in the pumpkin mix. It’s still sweet, just a tad less intense.
- Lower Fat: Swap half the butter for unsweetened applesauce. I’ve done this, and while the texture isn’t as rich, it’s still pretty darn good for Pumpkin Brownies.
- Egg Substitute: Use a flax egg (1 tbsp flaxseed meal + 2.5 tbsp water) for each egg if you’re vegan or cutting cholesterol. I think it works decently in this recipe.
- Whole Wheat Flour: Replace half the all-purpose flour with whole wheat for added fiber. I’ve tried it, and the Pumpkin Brownies are a bit denser but still tasty.
Serving Suggestions
I love serving Pumpkin Brownies in ways that make them feel extra special, whether it’s a casual snack or a fancy dessert. Here are some ideas based on how I’ve enjoyed them at home. Trust me, these little touches can elevate your Pumpkin Brownies experience!
- With a Dollop: Add a spoonful of whipped cream on top for a creamy contrast. It’s my go-to for cozy nights.
- Ice Cream Pairing: Serve warm with a scoop of vanilla or cinnamon ice cream. I did this at a dinner party, and everyone was obsessed with Pumpkin Brownies this way.
- Dusty Sweetness: Dust with powdered sugar right before serving for a pretty finish. It’s so simple but looks amazing.
- Coffee Companion: Pair a square of Pumpkin Brownies with a hot latte for the ultimate fall treat. It’s my favorite afternoon pick-me-up.
Common Mistakes to Avoid
I’ve made my fair share of blunders while perfecting Pumpkin Brownies, so I’m spilling the tea on what to watch out for. Trust me on this one—I’ve learned the hard way so you don’t have to. Here are the most common slip-ups when baking Pumpkin Brownies and how to dodge them.
- Overbaking: Baking too long turns these into dry squares instead of fudgy delights. I’ve pulled them out too late before, and it was such a bummer.
- Wrong Pumpkin: Using pumpkin pie filling instead of puree adds extra sugar and spices that mess up the balance. I did this once, and the Pumpkin Brownies were way too sweet.
- Skipping the Swirl: Not swirling the layers together can leave you with uneven bites. I forgot this step early on, and it just wasn’t as fun to eat.
- Cold Ingredients: Using cold eggs or butter can make the batter lumpy. I’ve rushed this before, and my Pumpkin Brownies suffered for it.
Storing Tips
I’ve found that Pumpkin Brownies keep pretty well if you store them right, which is great for making ahead. In my experience, a little planning means I can enjoy these treats all week. Here’s how to store your Pumpkin Brownies to keep them fresh.
- Room Temperature: Store in an airtight container for up to 2 days if you’ll eat them fast.
- Refrigerator: Keeps for 5-7 days in a sealed container for longer freshness.
- Freezer: Freeze individual squares for up to 2 months, wrapped tightly in plastic wrap.

Frequently Asked Questions
I get a lot of questions about Pumpkin Brownies, so I’ve rounded up the most common ones I’ve heard from friends and readers. Let’s tackle these head-on with some real-talk answers!
Can I use fresh pumpkin instead of canned?
Absolutely! I’ve roasted and pureed my own pumpkin before, and it works great for Pumpkin Brownies. Just make sure to drain excess water so it’s not too wet.
Can I make these gluten-free?
Yep, swap the flour for a 1:1 gluten-free blend. I’ve done it, and the texture holds up nicely.
Do I need to refrigerate them?
Not right away, but after a day or two, I pop my Pumpkin Brownies in the fridge to keep them fresh. They’ll last longer that way.
Can I double the recipe?
For sure! Use a 9×13 pan and bake a few minutes longer. I’ve doubled Pumpkin Brownies for parties with no issues.
How do I know when they’re done?
Check with a toothpick—if it comes out with moist crumbs, you’re good. Don’t wait for a clean toothpick, or they’ll overbake.
Can I add frosting?
You bet! A cream cheese frosting is amazing on these. I’ve slathered it on before, and it’s next-level.
Are these kid-friendly?
Totally. My kids devour Pumpkin Brownies, especially with chocolate chips mixed in. It’s a sneaky way to get some pumpkin in them!
Can I make them vegan?
Yes, use flax eggs and vegan butter. I’ve tried it once, and it’s not quite as rich, but still tasty.
Conclusion
I hope you’re as pumped as I am to bake these Pumpkin Brownies and bring a little fall magic to your kitchen. They’re honestly one of my favorite recipes to share, and I can’t wait to hear how yours turn out. Drop a comment with your twists on Pumpkin Brownies or any questions—I’m all ears!
Conclusion
I hope you enjoyed this recipe for Pumpkin Brownies! It’s truly one of my favorites, and I’m confident you’ll love it too.
Remember to follow the steps carefully for the best results. Don’t hesitate to experiment with your own variations and make this recipe your own. Happy cooking!