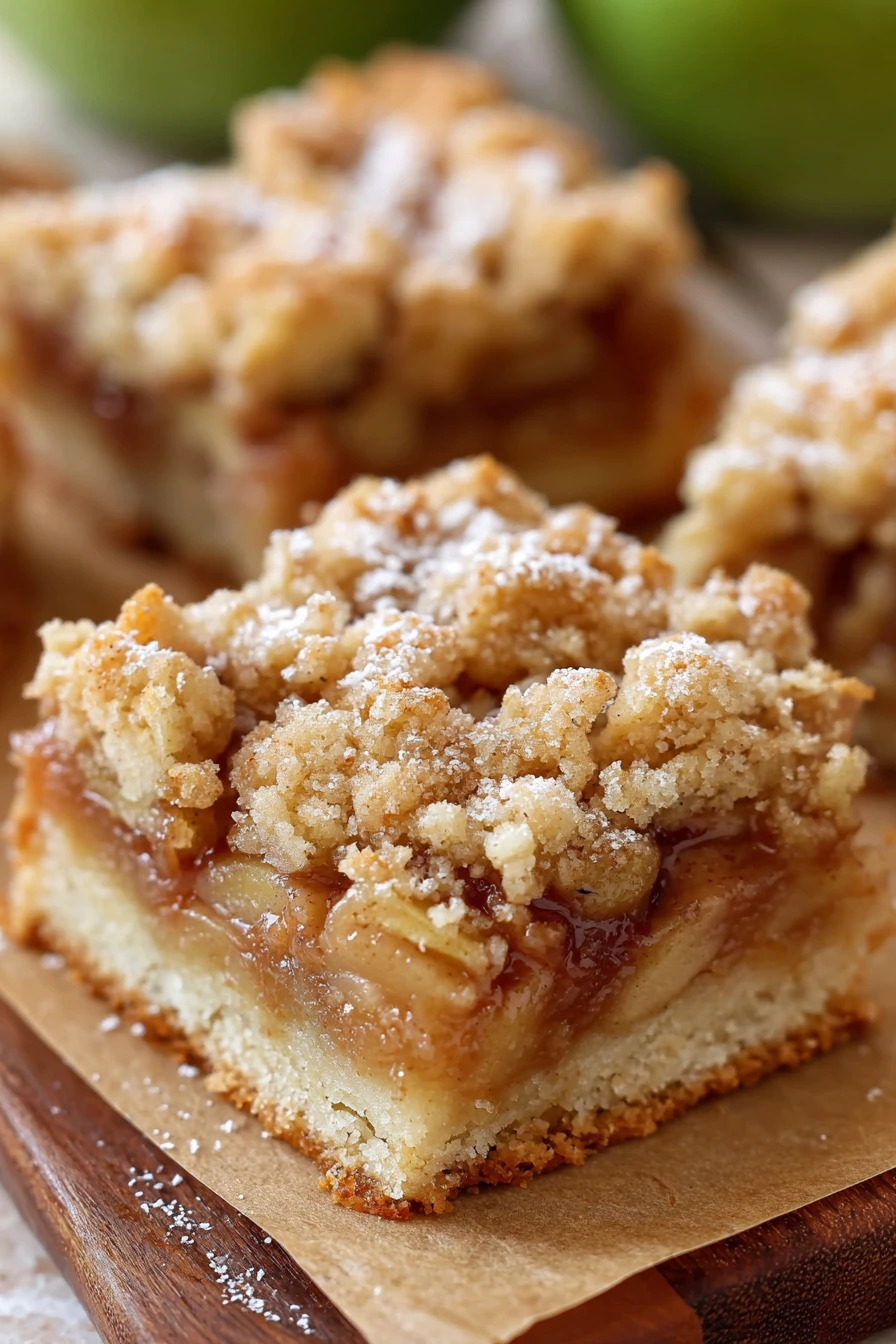
Irresistible Apple Pie Bars
Man, I still remember the first time I whipped up a batch of Irresistible Apple Pie Bars. It was a crisp fall afternoon, and I’d just come back from apple picking with my family, arms loaded with more Granny Smiths than I knew what to do with. I wanted something cozy and sweet, but easier than a full-blown pie, so I started tinkering in the kitchen, and let me tell you, these Irresistible Apple Pie Bars were a game-changer.
My kids couldn’t stop sneaking pieces before they even cooled, and my husband declared them “better than grandma’s pie” (don’t tell her!). Honestly, I’ve made these Irresistible Apple Pie Bars dozens of times since, tweaking the recipe until it’s just right. I’m so excited to share this with y’all today because, trust me, they’re gonna become your go-to fall treat.
If you’re like me and love the flavors of apple pie but don’t always have the patience for rolling out dough, these Irresistible Apple Pie Bars are your answer. Let’s dive into why they’re so darn special.
Why You’ll Love This Recipe
I’ve found that these Irresistible Apple Pie Bars strike the perfect balance between nostalgic comfort and no-fuss baking. They’ve got all the warm, cinnamony goodness of a classic pie, but in a handheld form that’s perfect for potlucks, lunchboxes, or just snacking on the couch. In my kitchen, they’re a guaranteed crowd-pleaser, no matter who’s over for dinner.
And can we talk about the smell while they bake? It’s like a hug from autumn itself. Whether you’re a seasoned baker or just starting out, you’ll love how approachable these Irresistible Apple Pie Bars are, and I’m betting they’ll disappear faster than you can say “seconds, please!”
Ingredients List
Let me break down what you’ll need for these Irresistible Apple Pie Bars. I’m pretty picky about my ingredients, so I’ll share my go-to brands or types where I can. Trust me, using fresh, quality stuff makes all the difference in a recipe as simple as this.
For the Crust and Crumble Topping
- 2 1/2 cups (310g) all-purpose flour, spooned and leveled for accuracy
- 1 cup (2 sticks or 226g) unsalted butter, cold and cubed (I prefer Land O’Lakes for its richness)
- 1/2 cup (100g) granulated sugar, for a subtle sweetness
- 1/4 teaspoon salt, to balance the flavors
For the Apple Filling
- 5 medium apples, peeled, cored, and diced (I usually buy Granny Smith for their tartness)
- 1/2 cup (100g) brown sugar, packed (light or dark, depending on your vibe)
- 2 tablespoons (30ml) lemon juice, freshly squeezed if possible for brightness
- 1 tablespoon (8g) cornstarch, to thicken the filling
- 1 1/2 teaspoons ground cinnamon, for that classic pie spice (I love McCormick here)
- 1/4 teaspoon ground nutmeg, just a pinch for warmth
I’ve played around with these measurements a ton to get the perfect texture for Irresistible Apple Pie Bars. If you’re tempted to skimp on the butter, don’t— it’s the secret to that buttery, melt-in-your-mouth crust. And for the apples, I’ve got a soft spot for Granny Smith, but I’ll chat more about swaps later.
These ingredients are your ticket to baking up some seriously Irresistible Apple Pie Bars!
Variations
One thing I adore about these Irresistible Apple Pie Bars is how easy they are to customize. I’ve tried a bunch of twists over the years, depending on what I’ve got in the pantry or who I’m baking for. Here are some of my favorite spins on this recipe—feel free to mix and match!
- Caramel Drizzle: Drizzle some store-bought or homemade caramel sauce over the top after baking for an extra decadent touch.
- Nutty Crunch: Toss in 1/2 cup of chopped walnuts or pecans to the crumble topping for a bit of texture (my husband goes nuts for this one).
- Spiced-Up Filling: Add a dash of ground cloves or allspice to the apple mixture for deeper flavor.
- Mixed Fruit: Swap out one apple for a cup of diced pears for a subtle twist on the classic.
- Oatmeal Topping: Mix 1/2 cup of rolled oats into the crumble for a heartier, breakfast-bar vibe.
- Vanilla Glaze: Whisk up a quick glaze with powdered sugar and a splash of vanilla extract to drizzle on top.
- Chocolate Chip Surprise: Sprinkle 1/3 cup of mini chocolate chips into the filling—my kids always ask for this version of Irresistible Apple Pie Bars!
- Maple Twist: Replace half the brown sugar with maple syrup in the filling for a cozy, fall-inspired sweetness.
I tried the caramel drizzle once for a holiday party, and let me tell ya, people were scraping the pan clean. Whether you keep it classic or get creative, these Irresistible Apple Pie Bars are so versatile, you can’t go wrong. What variation are you most excited to try?
Servings and Timing
Let’s talk logistics for these Irresistible Apple Pie Bars, ‘cause I know y’all are busy just like me. In my experience, this recipe comes together pretty quick once you’ve got the hang of it. Here’s the breakdown:
- Prep Time: 25 minutes
- Cook Time: 45 minutes
- Total Time: 1 hour 10 minutes
- Servings: 12-16 bars, depending on how generous you’re feeling
I’ve found this batch of Irresistible Apple Pie Bars is perfect for a small gathering or just to have leftovers for the week (if they last that long!). It usually takes me a little extra time to dice the apples, but hey, pop on a podcast and it’s kinda therapeutic.
Step-by-Step Instructions
Alright, let’s get down to business and make these Irresistible Apple Pie Bars! I’m walking you through every step like I’m right there in your kitchen. I’ve got some tricks up my sleeve to make this a breeze, so stick with me.

Step 1: Preheat and Prep
First things first, preheat your oven to 350°F (175°C) and line an 9×13-inch baking pan with parchment paper. I’ve learned the hard way that skipping the parchment makes for a sticky mess, so don’t skip this. It’s also a good time to peel and dice those apples if you haven’t yet.
Step 2: Make the Crust and Crumble
In a big ol’ bowl, mix the flour, sugar, and salt. Cut in the cold butter with a pastry cutter or your fingers until it looks like coarse crumbs—kinda like wet sand. I usually set aside about a cup of this mixture for the topping, then press the rest into the bottom of your pan to form the crust for these Irresistible Apple Pie Bars.
Step 3: Prepare the Apple Filling
Toss your diced apples with brown sugar, lemon juice, cornstarch, cinnamon, and nutmeg. Stir it up real good until every piece is coated. I like to let this sit for a few minutes while I sip my coffee—it helps the flavors meld for tastier Irresistible Apple Pie Bars.
Step 4: Assemble and Bake
Spread the apple mixture evenly over the crust, then sprinkle that reserved crumble mixture on top. Pop it in the oven for 40-45 minutes until the top is golden and the apples are tender. The smell of these Irresistible Apple Pie Bars baking is unreal—good luck not peeking!
Step 5: Cool and Slice
Here’s the hardest part: let it cool for at least an hour before slicing into bars. I’ve burned my tongue more times than I can count rushing this step. Once cooled, cut into squares and watch these Irresistible Apple Pie Bars disappear!
There ya go—my no-fail way to make Irresistible Apple Pie Bars that’ll have everyone asking for the recipe. Let me know if you’ve got any questions!
Nutritional Information
I’m no dietitian, but I like to keep an eye on what’s in my baked goods, especially with these Irresistible Apple Pie Bars since we eat ‘em so often. Here’s the rough breakdown per bar, based on 16 servings:
- Calories: 280 per serving
- Fat: 12g
- Protein: 2g
- Carbohydrates: 42g
- Sodium: 85mg
I think these Irresistible Apple Pie Bars are a pretty reasonable treat, especially if you’re mindful of portions (easier said than done, I know!). The apples add some natural goodness, but let’s be real—it’s still dessert!
Healthier Alternatives
If you’re looking to lighten up these Irresistible Apple Pie Bars, I’ve got ya covered with a few swaps I’ve tried myself. Baking doesn’t have to mean tossing out all your health goals, right? Here are some tweaks for guilt-free Irresistible Apple Pie Bars.
- Lower Sugar: Cut the granulated sugar in the crust by half and use a natural sweetener like honey in the filling.
- Reduced Fat: Swap half the butter for unsweetened applesauce in the crust—it’s not quite as rich, but still tasty.
- Whole Grain: Use whole wheat flour instead of all-purpose for a bit more fiber and nutty flavor.
- Less Topping: Skip some of the crumble topping to cut down on calories without losing the essence of Irresistible Apple Pie Bars.
When I’m watching my sweets intake, these swaps help me enjoy Irresistible Apple Pie Bars without the side of guilt. Give ‘em a shot and see what works for you!
Serving Suggestions
I love getting creative with how I serve these Irresistible Apple Pie Bars because, honestly, they’re good any time of day. Whether it’s a casual snack or a fancy dessert, here are my fave ways to dish ‘em up.
- For Dessert: Add a scoop of vanilla ice cream on top while they’re still warm—pure heaven!
- With Coffee: Pair a square of Irresistible Apple Pie Bars with your morning brew for a cozy start.
- Party Platter: Cut into bite-sized pieces and arrange on a tray for easy grabbing at gatherings.
- Whipped Cream Topping: Dollop some fresh whipped cream on each bar for an extra indulgent touch.
At my last family get-together, the ice cream combo was a total hit with these Irresistible Apple Pie Bars. How do you plan to serve yours?
Common Mistakes to Avoid
I’ve messed up my fair share of batches of Irresistible Apple Pie Bars, so let me save you the headache with some pitfalls to dodge. Trust me on this one—I’ve learned the hard way!
- Undercooked Apples: Don’t rush the baking time; soggy apples ruin the texture of Irresistible Apple Pie Bars.
- Overworking the Crust: Mix the dough just until it comes together, or you’ll end up with a tough base.
- Skipping Cooling: Cutting too soon makes a crumbly mess—been there, done that with these Irresistible Apple Pie Bars.
- Wrong Apple Type: Avoid super soft varieties like Red Delicious; they turn to mush instead of holding shape.
These tips come from my own kitchen disasters, so steer clear and you’ll have perfect Irresistible Apple Pie Bars every time.
Storing Tips
I’ve found that these Irresistible Apple Pie Bars keep pretty well if you store ‘em right, which is great ‘cause I love having extras on hand. Here’s how I do it:
- Refrigerator: Store in an airtight container for up to 5 days—they stay nice and fresh.
- Freezer: Wrap individual bars in plastic wrap, then pop in a freezer bag for up to 2 months.
- Room Temperature: Good for a day or two if it’s not too humid.
In my experience, refrigerated Irresistible Apple Pie Bars taste just as good on day three as day one with a quick zap in the microwave.

Frequently Asked Questions
I get a lot of questions about making Irresistible Apple Pie Bars, so let’s tackle the most common ones. I’ve got answers straight from my kitchen to yours!
Can I make Irresistible Apple Pie Bars ahead of time?
Absolutely, you can! I often bake them a day or two before a party, store ‘em in the fridge, and they’re just as tasty. Just reheat slightly if you want that fresh-baked vibe.
What apples work best?
I’m partial to Granny Smith for their tartness, but Honeycrisp or Braeburn are solid picks too. You want something firm that holds up during baking.
Can I use a different pan size?
Sure thing, though an 9×13 is ideal. A smaller pan means thicker bars and longer baking—check for doneness with a toothpick.
Are these bars freezer-friendly?
Yup, they freeze like a dream. Wrap ‘em tight, and they’ll keep for a couple months without losing flavor.
Can I skip the crumble topping?
You could, but why miss out on that crunch? It’s half the charm of Irresistible Apple Pie Bars, in my opinion.
How do I know when they’re done?
Look for a golden top and bubbly filling. If the apples are fork-tender, you’re golden too!
Can I double the recipe?
For sure, just use two pans or a larger one and adjust baking time. I’ve done this for big crowds with no issues.
Do I have to peel the apples?
Nah, but I prefer to ‘cause the texture’s smoother. It’s totally up to you—do what feels right.
Conclusion
Well, there ya have it—everything I know about making Irresistible Apple Pie Bars that’ll knock your socks off. I hope you’re as pumped as I am to bake up a batch of these Irresistible Apple Pie Bars and share ‘em with your crew. Drop a comment if you try ‘em or tweak the recipe—I’d love to hear how it goes for you with these Irresistible Apple Pie Bars!
Conclusion
I hope you enjoyed this recipe for Irresistible Apple Pie Bars! It’s truly one of my favorites, and I’m confident you’ll love it too. Remember to follow the steps carefully for the best results. Don’t hesitate to experiment with your own variations and make this recipe your own.
Happy cooking!