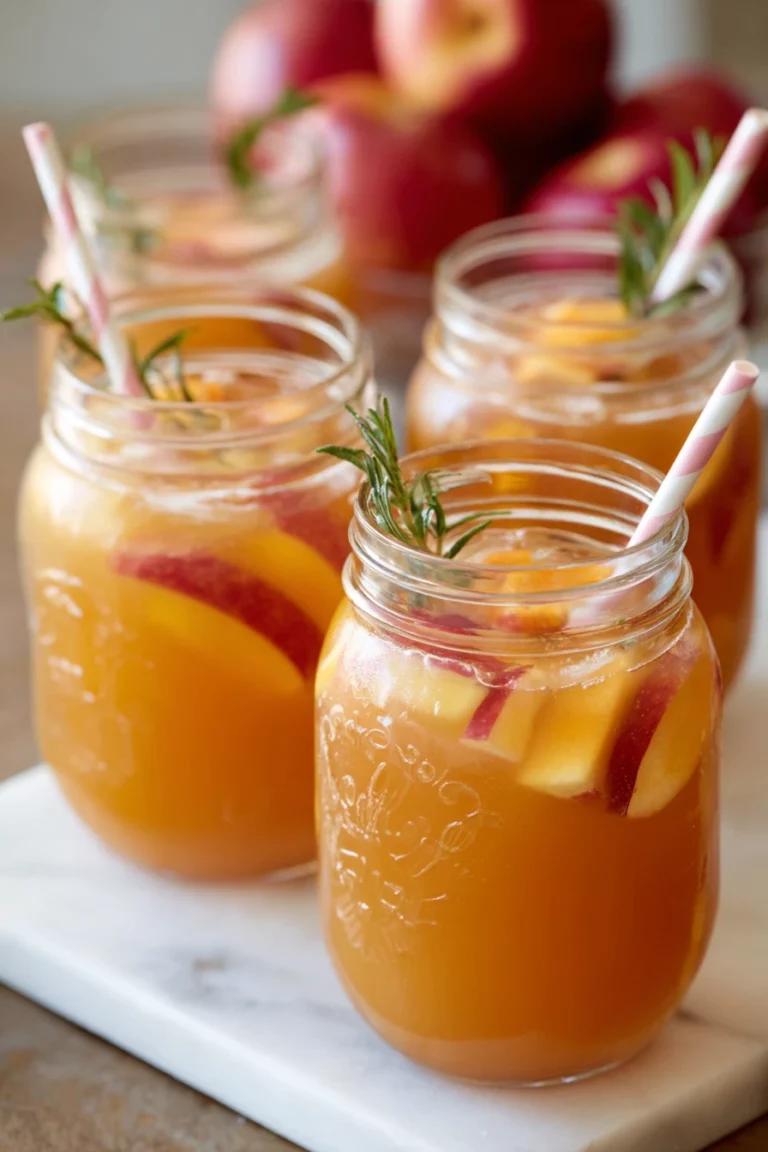
Homemade Apple Cider
Fall always sneaks up on me, and with it comes the urge to cozy up with something warm and comforting. A few years back, I stumbled upon the magic of making Homemade Apple Cider from scratch, and let me tell ya, it’s been a game-changer in my kitchen.
There’s something about the smell of simmering apples and spices that just screams autumn, and my family can’t get enough of it. Honestly, once you’ve tried Homemade Apple Cider, those store-bought versions just don’t cut it.
I still remember the first time I attempted Homemade Apple Cider; I was a bit of a hot mess, not gonna lie. I didn’t core the apples properly, and somehow ended up with a gritty texture that my husband politely sipped through a forced smile.
But after a few tries (and a lot of laughs), I’ve nailed down a foolproof way to whip up this drink that’s perfect for chilly days. So, stick with me, and I’ll walk you through how to make your own batch of Homemade Apple Cider that’ll have everyone begging for seconds.
Why You’ll Love This Recipe
I’ve found that making Homemade Apple Cider isn’t just about the end result; it’s the whole dang process that hooks you. The way your house fills up with the sweet, spicy aroma of apples and cinnamon sticks is like a warm hug on a cold day. Plus, it’s super easy, even if you’re not a pro in the kitchen, and you get to control exactly what goes into it.
In my kitchen, Homemade Apple Cider is a staple for fall gatherings, and I love how it doubles as a crowd-pleaser for kids and adults alike. Whether you’re sipping it by a bonfire or just curled up with a book, there’s something magical about this drink. Trust me, once you’ve tasted it fresh, you’ll be hooked on making Homemade Apple Cider every year.
Ingredients List
Alright, let’s talk about what you’ll need to make Homemade Apple Cider that tastes like a crisp autumn day in a mug. I’m a bit picky about my apples, to be honest, and I usually go for a mix of sweet and tart varieties to get that perfect balance. Here’s my go-to list of ingredients, with exact measurements, because I’ve learned that eyeballing it doesn’t always work out (yep, been there).
- 10 medium apples (about 3-4 lbs), a mix of Honeycrisp and Granny Smith for that sweet-tart vibe
- 1 orange, peeled and quartered, for a citrusy brightness
- 4 cinnamon sticks, because you can’t have Homemade Apple Cider without that warm spice kick
- 1 teaspoon whole cloves, for a subtle, earthy depth
- 1 teaspoon allspice berries, optional but adds a nice complexity
- 1/2 cup (100g) brown sugar, adjust to taste if you like it sweeter or less sweet
- 8 cups (2 liters) water, enough to cover the apples in the pot
I prefer buying my apples fresh from a local orchard if I can swing it, especially in the fall when they’re at their peak. And hey, if you’ve got a favorite apple variety, go with what you love—Homemade Apple Cider is super forgiving. Just don’t skip the spices; they’re what transform this from apple juice to pure cozy magic.
Variations
One of the things I adore about Homemade Apple Cider is how easy it is to switch things up based on your mood or what’s in your pantry. I’ve played around with a bunch of twists over the years, and some have become family favorites while others were, well, learning experiences. Here are a few variations that’ll keep your Homemade Apple Cider game strong, with my personal thoughts on each.
- Spicy Kick: Toss in a small piece of fresh ginger (about 1 inch, sliced) while simmering for a warming, zesty punch. I tried this once during a cold snap, and it felt like a hug from the inside out.
- Maple Twist: Swap the brown sugar for 1/3 cup of pure maple syrup. My kids always ask for this version—it’s like breakfast in a mug.
- Cranberry Blend: Add 1 cup of fresh cranberries to the pot for a tart, festive vibe. I did this for a holiday party, and the color alone was a showstopper.
- Vanilla Dream: Stir in 1 teaspoon of vanilla extract after straining for a creamy, dessert-like note. This one’s my personal fave for late-night sipping.
- Star Anise Magic: Drop in 2-3 star anise pods while cooking for an exotic, licorice-y undertone. I wasn’t sure about this at first, but now I’m obsessed.
- Adult Version: Spike your Homemade Apple Cider with a splash of bourbon or rum after it’s done. I’ve served this at grown-up gatherings, and let’s just say it disappears fast.
- Herbal Touch: Add a sprig of fresh rosemary for an unexpected earthy twist. I stumbled on this by accident, and it’s surprisingly refreshing.
Feel free to mix and match these ideas for your Homemade Apple Cider. Honestly, half the fun is experimenting and finding what hits the spot for you and yours. What’s your go-to twist? I’d love to hear about it!
Servings and Timing
Let’s get down to the nitty-gritty of how much Homemade Apple Cider this recipe makes and how long it’ll take. In my experience, timing can vary a bit depending on how fast your stove simmers, but I’ve got a solid estimate based on my many batches. Here’s the breakdown for planning your cozy drink sesh.
- Prep Time: 10 minutes
- Cook Time: 2-3 hours (or 6-8 hours in a slow cooker)
- Total Time: About 2.5-3 hours on the stove
- Servings: 8-10 cups of Homemade Apple Cider
I usually make this on a lazy weekend afternoon when I can let it bubble away without rushing. That slow simmer is key to getting all those flavors to meld into the best Homemade Apple Cider you’ve ever had.
Step-by-Step Instructions
Making Homemade Apple Cider is easier than you’d think, even if you’re not a kitchen wizard. I’ve broken it down into simple steps, with a few of my personal tricks sprinkled in to save you from the oopsies I’ve made. Let’s get started, shall we?

Step 1: Prep the Apples and Spices
First things first, wash your apples well and cut them into quarters. No need to peel or core ‘em—I used to stress over this, but leaving the skins on adds so much flavor to your Homemade Apple Cider. Toss the apple chunks into a large pot, along with the orange quarters, cinnamon sticks, cloves, and allspice berries if you’re using them.
Step 2: Add Water and Simmer
Pour in the 8 cups of water until the apples are just covered. Bring it to a boil over medium-high heat, then lower it to a gentle simmer. Cover the pot (but leave a tiny crack for steam) and let it cook for 2-3 hours, stirring every now and then. This is where the magic happens for Homemade Apple Cider—the longer it simmers, the deeper the flavor gets.
Step 3: Mash and Strain
Once the apples are super soft and mushy (like they’ve given up on life), use a potato masher to squish them right in the pot. This step is oddly satisfying, I gotta say. Then, strain the mixture through a fine-mesh sieve or cheesecloth into a clean pot or bowl, pressing down to get every last drop of that Homemade Apple Cider goodness.
Step 4: Sweeten and Serve
Stir in the brown sugar while it’s still warm, tasting as you go to get the sweetness just right. I’ve learned that some apples are naturally sweeter, so you might not need all the sugar. Reheat your Homemade Apple Cider if needed, then ladle it into mugs. Honestly, sipping it straight from the pot is my guilty pleasure—don’t judge!
I’ve made this so many times now, and my little shortcut is using a slow cooker if I’m busy. Just dump everything in, set it on low for 6-8 hours, and come home to the best-smelling house ever with Homemade Apple Cider ready to go.
Nutritional Information
I’m not gonna pretend I’m a nutritionist, but I’ve looked into the basics of Homemade Apple Cider because, well, I’m curious about what I’m sipping on. Here’s a rough idea per 1-cup serving, though it can vary based on how much sugar you add or the apples you use.
- Calories: 120 per serving
- Fat: 0g
- Protein: 0g
- Carbohydrates: 30g
- Sodium: 10mg
I love that Homemade Apple Cider is naturally pretty light, especially since I’m not adding a ton of extras. It’s a guilt-free treat in my book, though I’ll admit I don’t count calories when I’m enjoying a second mug of Homemade Apple Cider by the fire.
Healthier Alternatives
If you’re watching what you eat or just wanna mix things up, I’ve got a few tweaks for making Homemade Apple Cider a bit lighter. I’ve tried these myself when I’m feeling like I need to balance out all the holiday cookies. Here’s what’s worked for me.
- No Added Sugar: Skip the brown sugar altogether if your apples are sweet enough. I’ve done this with Honeycrisp batches, and it’s still delish.
- Low-Cal Sweetener: Use a stevia blend or monk fruit sweetener instead of sugar. I was skeptical, but it’s a decent swap for Homemade Apple Cider.
- Half the Spices: If you’re sensitive to strong flavors, cut back on cloves or allspice. I’ve dialed it down for my mom, and she loved her milder Homemade Apple Cider.
- Apple Juice Base: If you’re short on time, start with unsweetened apple juice and simmer with spices. It’s not quite the same, but I’ve used this hack for a quick fix.
These options keep the cozy factor of Homemade Apple Cider without overloading on sugar or calories. Play around and see what fits your vibe!
Serving Suggestions
I’ve got a soft spot for finding fun ways to serve Homemade Apple Cider, especially since it’s such a versatile drink. Whether it’s a casual night in or a big holiday shindig, here are my favorite pairings straight from my kitchen experiments.
- With Snacks: Pair your Homemade Apple Cider with a plate of sharp cheddar and crackers. I love how the tanginess cuts through the sweetness.
- Dessert Combo: Serve alongside a slice of apple pie for double the apple love. I did this at Thanksgiving, and it was a hit!
- Breakfast Treat: Enjoy with warm cinnamon rolls on a lazy morning. My family begs for this combo every fall weekend with Homemade Apple Cider.
- Party Style: Set up a cider bar with toppings like whipped cream and caramel drizzle. I tried this at a get-together, and everyone went nuts over their custom Homemade Apple Cider.
How do you like to sip yours? I’m always up for new ideas to jazz it up.
Common Mistakes to Avoid
I’ve had my fair share of kitchen blunders while perfecting Homemade Apple Cider, so I’m spilling the tea on what to watch out for. Trust me, I learned these lessons the hard way, and I don’t want you to repeat my goofs.
- Overcooking the Apples: Don’t let them simmer too long past the mushy stage, or you’ll get a bitter edge. I did this once and had to toss the whole batch of Homemade Apple Cider.
- Skipping the Strain: If you don’t strain properly, you’ll end up with gritty cider. Been there, and it’s not a good look for Homemade Apple Cider.
- Too Much Sugar: Add sweetener slowly and taste as you go. I dumped in too much once, and it was like drinking candy—yuck!
- Wrong Apple Mix: Using only tart apples can make it too sharp. I made this mistake early on with Homemade Apple Cider, and my kids weren’t fans.
Take it from me, a little patience and attention go a long way. You’ve got this!
Storing Tips
I’ve found that Homemade Apple Cider keeps pretty well if you store it right, which is great for making big batches. Here’s how I handle leftovers to keep that fresh flavor locked in.
- Refrigerator: Store in an airtight container or jar for up to a week. I usually reheat just what I need for a quick mug of Homemade Apple Cider.
- Freezer: Freeze in portions for up to 3 months. I freeze mine in mason jars (leaving headspace for expansion) for easy Homemade Apple Cider on demand.
- Reheating: Warm it up on the stove over low heat to avoid scorching. It tastes just as good as day one, in my experience.

Frequently Asked Questions
I get a lot of questions about making Homemade Apple Cider, so I’ve rounded up the most common ones with my honest answers. Let’s dive in!
Can I make Homemade Apple Cider ahead of time?
Absolutely, and I often do! Prepare it a day or two in advance and store it in the fridge. Just reheat before serving, and it’s good as new.
Do I have to use fresh apples?
Fresh is best for that true Homemade Apple Cider taste, but if you’re in a pinch, unsweetened apple juice works as a base with spices. It’s not quite the same, though.
Can I use a slow cooker?
Yup, it’s my lazy-day method! Cook on low for 6-8 hours, then strain. Perfect for hands-off Homemade Apple Cider.
Is it okay to skip the orange?
Sure, it’s optional. The orange adds a citrusy note, but your cider will still be delish without it.
How do I make it less sweet?
Use tart apples like Granny Smith and cut back on sugar. Taste as you go—it’s super easy to adjust.
Can kids drink this?
Of course, as long as you’re not adding alcohol! My kiddos love it, especially with a cinnamon stick to stir.
What if my cider is too spicy?
If the cloves or cinnamon overpower it, dilute with a bit of water or apple juice. I’ve had to do this once or twice.
Can I reuse the apple pulp?
Yeah, I’ve turned it into applesauce by blending with a little sugar. No waste in my kitchen!
Conclusion
There you have it, my tried-and-true guide to making Homemade Apple Cider that’ll warm you from the inside out. I hope you’ll give this a whirl and fill your home with those amazing fall vibes that only Homemade Apple Cider can bring. Drop a comment if you try it—I’d love to hear how it turns out or any fun twists you add to your batch of Homemade Apple Cider!
Conclusion
I hope you enjoyed this recipe for Homemade Apple Cider! It’s truly one of my favorites, and I’m confident you’ll love it too.
Remember to follow the steps carefully for the best results. Don’t hesitate to experiment with your own variations and make this recipe your own. Happy cooking!