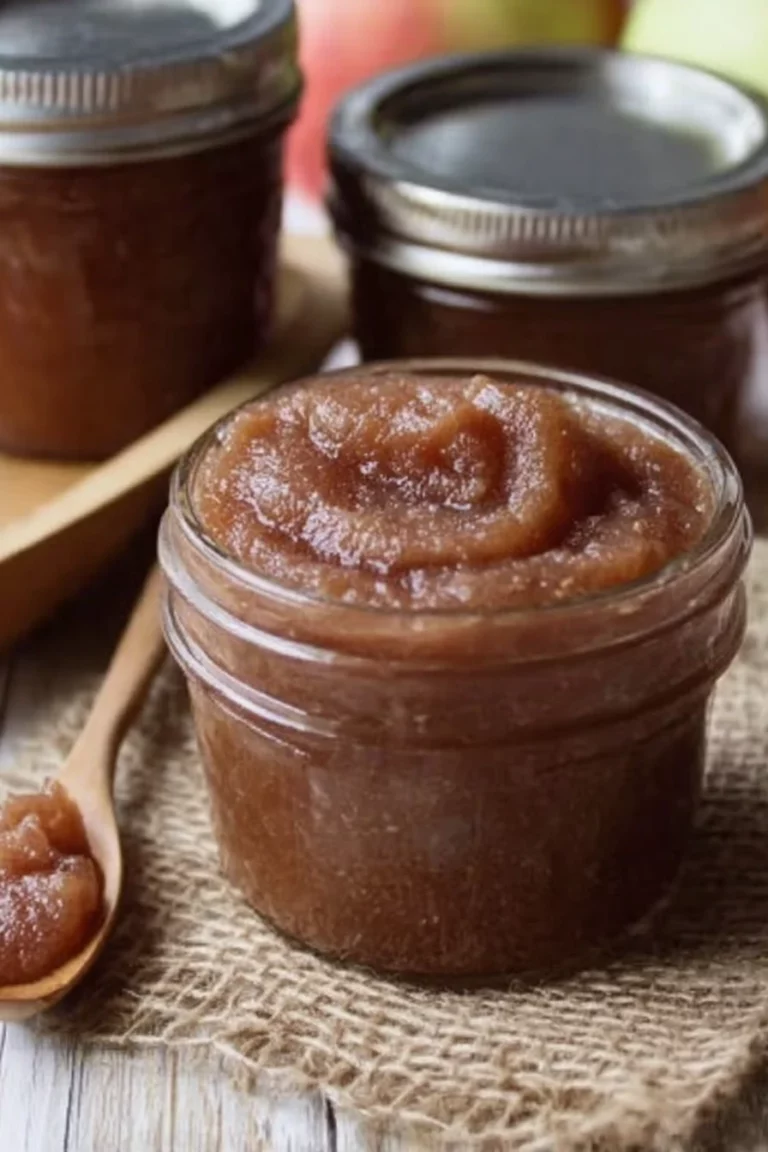
Fried apples recipe
Hey there, friends! I’ve got a real treat for you today with my go-to fried apples recipe that’s been a staple in my kitchen for years. I first stumbled upon this gem of a dish during a chilly fall weekend when I had a surplus of apples from a local orchard trip, and let me tell you, the smell of them sizzling in the pan with cinnamon and butter is pure magic.
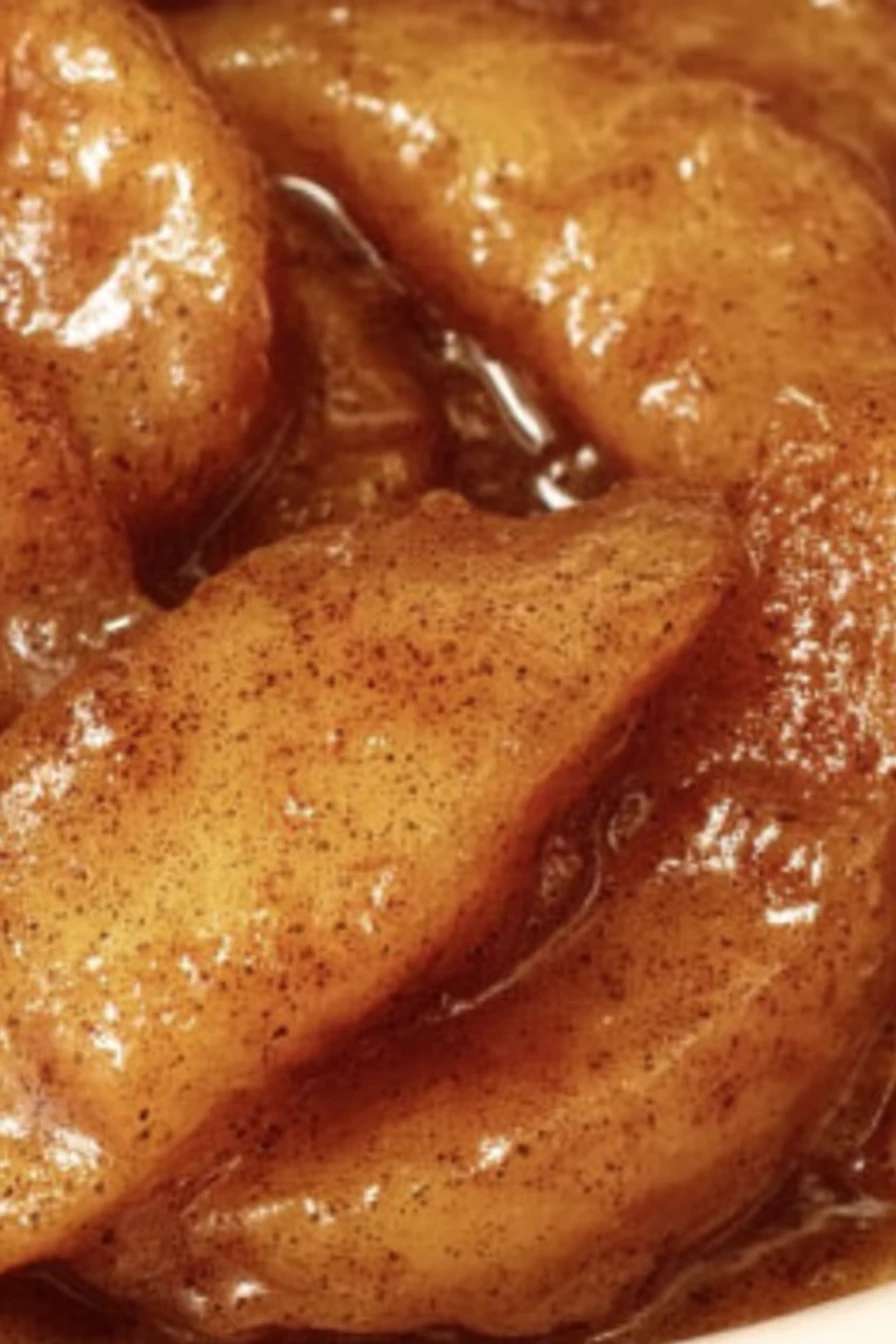
If you’re looking for a cozy, comforting side or dessert, this fried apples recipe is gonna steal your heart.
I remember the first time I whipped up this fried apples recipe for my family; my kids couldn’t stop sneaking bites straight from the pan (and honestly, I didn’t stop them). It’s one of those dishes that just brings everyone together, whether it’s paired with a hearty breakfast or served warm with a scoop of ice cream. So, grab your skillet, and let’s dive into making this fried apples recipe your new favorite too!
Why You’ll Love This Recipe
I’ve found that this fried apples recipe is a total crowd-pleaser, no matter the occasion. It’s ridiculously easy to throw together, which is a lifesaver on busy days when I’m juggling a million things in the kitchen. Plus, the way the apples soften into this sweet, spiced perfection just makes my heart happy every single time.
And can we talk about versatility? In my experience, this fried apples recipe works as a side for pork chops, a topping for pancakes, or even a sneaky late-night snack. It’s comfort food at its finest, and I bet you’ll be hooked after the first bite!
Ingredients List
When it comes to crafting the perfect fried apples recipe, I’m pretty picky about my ingredients because quality makes all the difference. I usually buy apples that are on the tart side, like Granny Smith, but I’ve also had great luck with Honeycrisp for a sweeter vibe. Let’s break down everything you’ll need to make this fried apples recipe shine in your kitchen.
Here’s the lineup for a batch of my fried apples recipe (serves about 4-6 folks):
- 6 medium apples, peeled, cored, and sliced into 1/4-inch wedges (I prefer Granny Smith for that tart kick)
- 4 tablespoons (60g) unsalted butter, because nothing beats that rich, melty goodness
- 1/3 cup (65g) granulated sugar, though you can adjust if your apples are super sweet
- 2 teaspoons ground cinnamon, for that warm, cozy flavor
- 1/4 teaspoon ground nutmeg, just a pinch for depth (optional, but I love it)
- 1 tablespoon (15ml) lemon juice, to brighten up the flavors and keep the apples from browning
- 1/8 teaspoon salt, to balance all that sweetness
I’ve been making this fried apples recipe for so long that I’ve got my measurements down to a science, but don’t stress if you’re off by a smidge. These ingredients are forgiving, and honestly, a little extra cinnamon never hurt anybody!
Variations
One of the things I adore about this fried apples recipe is how easy it is to tweak based on what I’m craving or what I’ve got in the pantry. I’ve played around with tons of twists over the years, and my family always has opinions on their favorites. If you’re looking to switch up your fried apples recipe, here are some ideas that have worked wonders for me.
- Brown Sugar Swap: Use brown sugar instead of white for a deeper, molasses-like sweetness. I tried this once on a whim, and now it’s my go-to for cooler months.
- Maple Drizzle: Add a tablespoon of maple syrup near the end of cooking for a sticky, autumnal vibe.
- Spiced-Up Kick: Toss in a pinch of ground cloves or allspice for extra warmth. My husband loves this version with holiday meals.
- Nutty Crunch: Sprinkle in a handful of chopped pecans or walnuts right before serving. My kids always ask for this one!
- Boozy Twist: Splash in a tablespoon of bourbon or rum for a grown-up take. I made this for a dinner party, and let’s just say it was a hit.
- Vanilla Vibes: Stir in a teaspoon of vanilla extract at the end for a subtle, creamy note.
- Berry Boost: Mix in some fresh blueberries or cranberries for a tart contrast. I’ve done this for brunch, and it’s just gorgeous.
Seriously, the possibilities with a fried apples recipe are endless, so don’t be afraid to experiment and make it your own!
Servings and Timing
I’ve made this fried apples recipe so many times that I’ve got the timing down pat, even when I’m multitasking in the kitchen. In my experience, it’s a quick dish to whip up, which is perfect for those spontaneous dessert cravings. Here’s how it breaks down for a standard batch of my fried apples recipe.
- Prep Time: 10 minutes
- Cook Time: 15 minutes
- Total Time: 25 minutes
- Servings: 4-6 portions
This fried apples recipe is ideal for a small family gathering or a cozy night in, and the timing makes it a breeze even on busy weeknights.
Step-by-Step Instructions
Alright, let’s get into the nitty-gritty of making this fried apples recipe. I’m gonna walk you through each step like I’m right there in your kitchen, sharing all my little tricks. Trust me, I’ve messed this up enough times to know what works!

Step 1: Prep Your Apples
Start by peeling, coring, and slicing your apples into even 1/4-inch wedges. I’ve found that keeping the slices uniform helps them cook at the same rate, so you don’t end up with some mushy and some crunchy. (Been there, done that!) A good apple corer saves me so much hassle here.
Step 2: Melt the Butter
Grab a large skillet and melt your 4 tablespoons of butter over medium heat. I swear by a cast-iron skillet for this fried apples recipe because it distributes heat like a dream. Watch that butter sizzle, but don’t let it brown too much, or it’ll taste nutty in a way that doesn’t quite fit.
Step 3: Cook the Apples
Toss in your apple slices and stir to coat them in that buttery goodness. Cook for about 5-7 minutes, stirring occasionally, until they start to soften. This is where the magic of this fried apples recipe happens—your kitchen will smell like a fall festival!
Step 4: Add the Sweet and Spice
Sprinkle in the sugar, cinnamon, nutmeg (if using), and salt, then drizzle with lemon juice. Stir everything together and let it cook for another 5-8 minutes until the apples are tender and coated in a glossy, spiced syrup. I like to sneak a taste at this point for, uh, quality control.
Step 5: Serve It Up
Once the apples are as soft as you like (I prefer mine with a tiny bit of bite), take the skillet off the heat. This fried apples recipe is best served warm, so don’t wait too long to dig in. If I’m feeling fancy, I’ll transfer them to a pretty dish, but straight from the pan works just fine too!
Step 6: Enjoy the Leftovers (If Any)
If you’ve got any extras from this fried apples recipe, they reheat beautifully. I’ve even caught myself eating them cold straight from the fridge at midnight. No judgment here—just pure, apple-y bliss.
Nutritional Information
I’m no dietitian, but I always like to keep an eye on what I’m serving my family, so here’s the breakdown for this fried apples recipe. These numbers are per serving, based on 6 portions, and I think they’re pretty reasonable for an occasional treat. Let’s take a peek at the stats for my fried apples recipe.
- Calories: 180 per serving
- Fat: 8g
- Protein: 0.5g
- Carbohydrates: 28g
- Sodium: 50mg
This fried apples recipe isn’t exactly health food, but it’s not a total splurge either, especially if you’re mindful of portion sizes like I try to be.
Healthier Alternatives
If you’re looking to lighten up this fried apples recipe, I’ve got a few swaps I’ve tried over the years that still keep things tasty. I’m not always in diet mode, but when I’m watching my sugar or fat intake, these tweaks save the day. Here are some ideas to make your fried apples recipe a bit guilt-free.
- Butter Reduction: Cut the butter down to 2 tablespoons and use a non-stick skillet to avoid sticking.
- Sugar Swap: Replace half the granulated sugar with a natural sweetener like honey or agave. I’ve done this and barely noticed a difference!
- Cinnamon Boost: Up the cinnamon to mask a lower sugar amount; it adds flavor without calories.
- Coconut Oil: Swap butter for coconut oil if you’re avoiding dairy. I’ve tried this in my fried apples recipe, and it adds a subtle tropical note I kinda dig.
Serving Suggestions
I love how versatile this fried apples recipe is when it comes to serving. Whether it’s breakfast, dinner, or dessert, I’ve got a soft spot for pairing these sweet beauties with just about anything. Check out some of my favorite ways to enjoy a batch of fried apples recipe goodness.
- Breakfast Bliss: Spoon over fluffy pancakes or waffles with a dollop of whipped cream.
- Dinner Sidekick: Serve alongside roasted pork or chicken for a sweet-savory balance.
- Dessert Dream: Top with a scoop of vanilla ice cream or a drizzle of caramel sauce. At my last family gathering, this fried apples recipe stole the show!
- Snack Attack: Just eat them straight from the bowl with a fork—I won’t tell.
Common Mistakes to Avoid
I’ve botched this fried apples recipe more times than I care to admit, but those flops taught me what not to do. Trust me on this one, avoiding these pitfalls will save you some kitchen grief. Here are the biggest mistakes I’ve made with my fried apples recipe over the years.
- Overcooking: Don’t let the apples turn to mush; check them often after 10 minutes. I learned this the hard way with a sad apple sauce incident.
- Wrong Apple Type: Skip super soft varieties like Red Delicious—they fall apart.
- Too Much Sugar: Start with less and taste as you go, or you’ll end up with candy instead of a fried apples recipe.
- High Heat: Keep it medium, or the butter burns before the apples cook. Been there, smelled that!
Storing Tips
I’ve found that leftovers of this fried apples recipe keep pretty darn well if you store them right. In my experience, they’re just as tasty the next day, which is a win for meal prep. Here’s how I handle storing my fried apples recipe.
- Refrigerator: Store in an airtight container for up to 4 days.
- Freezer: Freeze in portions for up to 2 months; just thaw overnight before reheating.
- Reheating: Warm gently on the stovetop with a splash of water to loosen the sauce.

Frequently Asked Questions
I get a lot of questions about this fried apples recipe, so I’ve rounded up the most common ones I hear from friends and readers. Let’s tackle them with some real-talk answers!
Can I use different types of apples?
Absolutely, you can! I usually stick to tart ones like Granny Smith, but a mix of sweet and tart works great for a balanced fried apples recipe.
Do I have to peel the apples?
Nah, it’s up to you. I peel mine for a softer texture, but leaving the skin on adds a bit of chew and extra nutrients.
Can I make this ahead of time?
For sure! Make your fried apples recipe a day or two ahead and just reheat before serving. It holds up like a champ.
Is this recipe vegan?
It can be! Swap the butter for a plant-based alternative, and you’ve got a vegan-friendly fried apples recipe.
How do I prevent soggy apples?
Don’t overcook, and keep the heat at medium. Soggy apples are a bummer, trust me.
Can I add other fruits?
Oh yeah, toss in pears or even peaches for a fun twist. I’ve tried it, and it’s delish.
Does this work with canned apples?
I wouldn’t recommend it; fresh apples give the best texture for a fried apples recipe. Canned ones get too mushy, in my opinion.
How do I adjust the sweetness?
Start with less sugar and taste as you go. Apples vary in natural sweetness, so play it by ear.
Conclusion
Well, there you have it, folks—my tried-and-true fried apples recipe that never fails to bring smiles to the table. I hope you’ll give this fried apples recipe a whirl and make some cozy memories of your own. If you’ve got questions or fun variations, drop ‘em below—I’d love to hear how your fried apples recipe turns out!
Conclusion
I hope you enjoyed this recipe for Fried apples recipe! It’s truly one of my favorites, and I’m confident you’ll love it too. Remember to follow the steps carefully for the best results.
Don’t hesitate to experiment with your own variations and make this recipe your own. Happy cooking!